

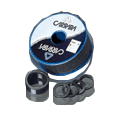
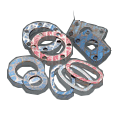


Spiral wound gaskets are a game-changing addition to your workplace. They keep the joints of your machinery sealed much tighter than most other gaskets and therefore help you run a tight ship in the bigger picture.
There are many things at risk if you don’t use the right gasket. Damaged machinery, financial setbacks, delayed production and downtime are all some of the dreaded effects of this; luckily, spiral wound gaskets offer supreme sealing capabilities as well as durability, minimising the risk of negative impacts.
Installing a spiral wound gasket is the first step to improving your equipment quality. So, here’s how to install a spiral wound gasket, thanks to the experts at Steamline Engineering.
1) Clean sealing surface
Remove your old gasket from the flange and start cleaning the sealing surface. Use a wire brush, or another manufacturer-recommended instrument, to physically remove any material embedded in the sealing face or flange serrations. Don’t use anything that could damage the sealing surface – chisels, hammers, abrasive materials, etc.
2) Flange alignment
No matter the quality of your spiral wound gasket, it won’t be able to effectively perform its job if the flanges are out of whack. Therefore, it’s important to align your flanges first, giving your spiral wound gasket the best chance of applying a uniform maximum gasket. Look to the manufacturer’s instructions when aligning flanges.
3) Installing your spiral wound gasket
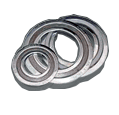
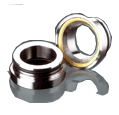
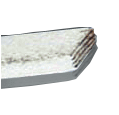
Examine your new spiral wound gasket, making sure it’s in perfect condition, free of structural defects. Carefully insert the spiral wound gasket between the flanges so that it’s right in the centre. Don’t apply release agents to the sealing surface, even for difficult installations; this can cause a chemical corrosion, compromising the gasket properties and its durability.
4) Tighten the bolts
Before tightening the nuts, consult the gasket manufacturer for recommended torque values, ensuring that bolt stresses created by the recommended torque are within the limits for the bolting material. Otherwise a failure can occur. When tightening the nut, bring the flanges in, as parallel as possible.
5) Check and recalibrate
This step is crucial when installing a spiral wound gasket – checking to see if you’ve installed it properly. Check and recalibrate the torque of the connecting bolts after giving your equipment a test-run. Failing to do this could result in faster wear and tear of your spiral wound gasket, and less effective surface sealing, causing gradual damage to your machinery.
Spiral wound gaskets are easy to install. To invest in the highest quality spiral wound gaskets, contact the team at Steamline Engineering. They provide high-quality Carrara metallic gaskets which are known world-wide for the strength, performance and durability. Steamline are also Australia’s leading team for other industrial equipment like thermal tapes and seals, welding blankets and valve packing materials. Browse the arrange at Steamline Engineering and get your quality products shipped Australia-wide.